Showing posts with label birthday. Show all posts

Wednesday, April 5, 2017

Birthday Bright Project Kit

Project kits! I just love kits! Opening the box, looking through all the fun supplies inside and knowing that in a short time I'll have some adorable projects and that time was saved because I didn't have to design the projects, pick out the papers, stamp sets, ink and accessories. The work was all done for me! The Birthday Bright Project Kit is one of those amazing kits that I couldn't wait to get my hands on and put together.

The kit makes a total of 12 cards (4 each of 3 designs) and 12 tags (4 each of 3 designs).

Please note: The Birthday Bright Kit Class that was originally scheduled for Saturday, May 20th has been postponed. We're going to be having a Retirement Party instead. Can you believe the Retirement List will be out on April 10th? It's already time to say "goodbye" to some of our favorite stamp sets and accessories.

Card #1 - Candles Shaker Card
Confetti included! How fun is that?


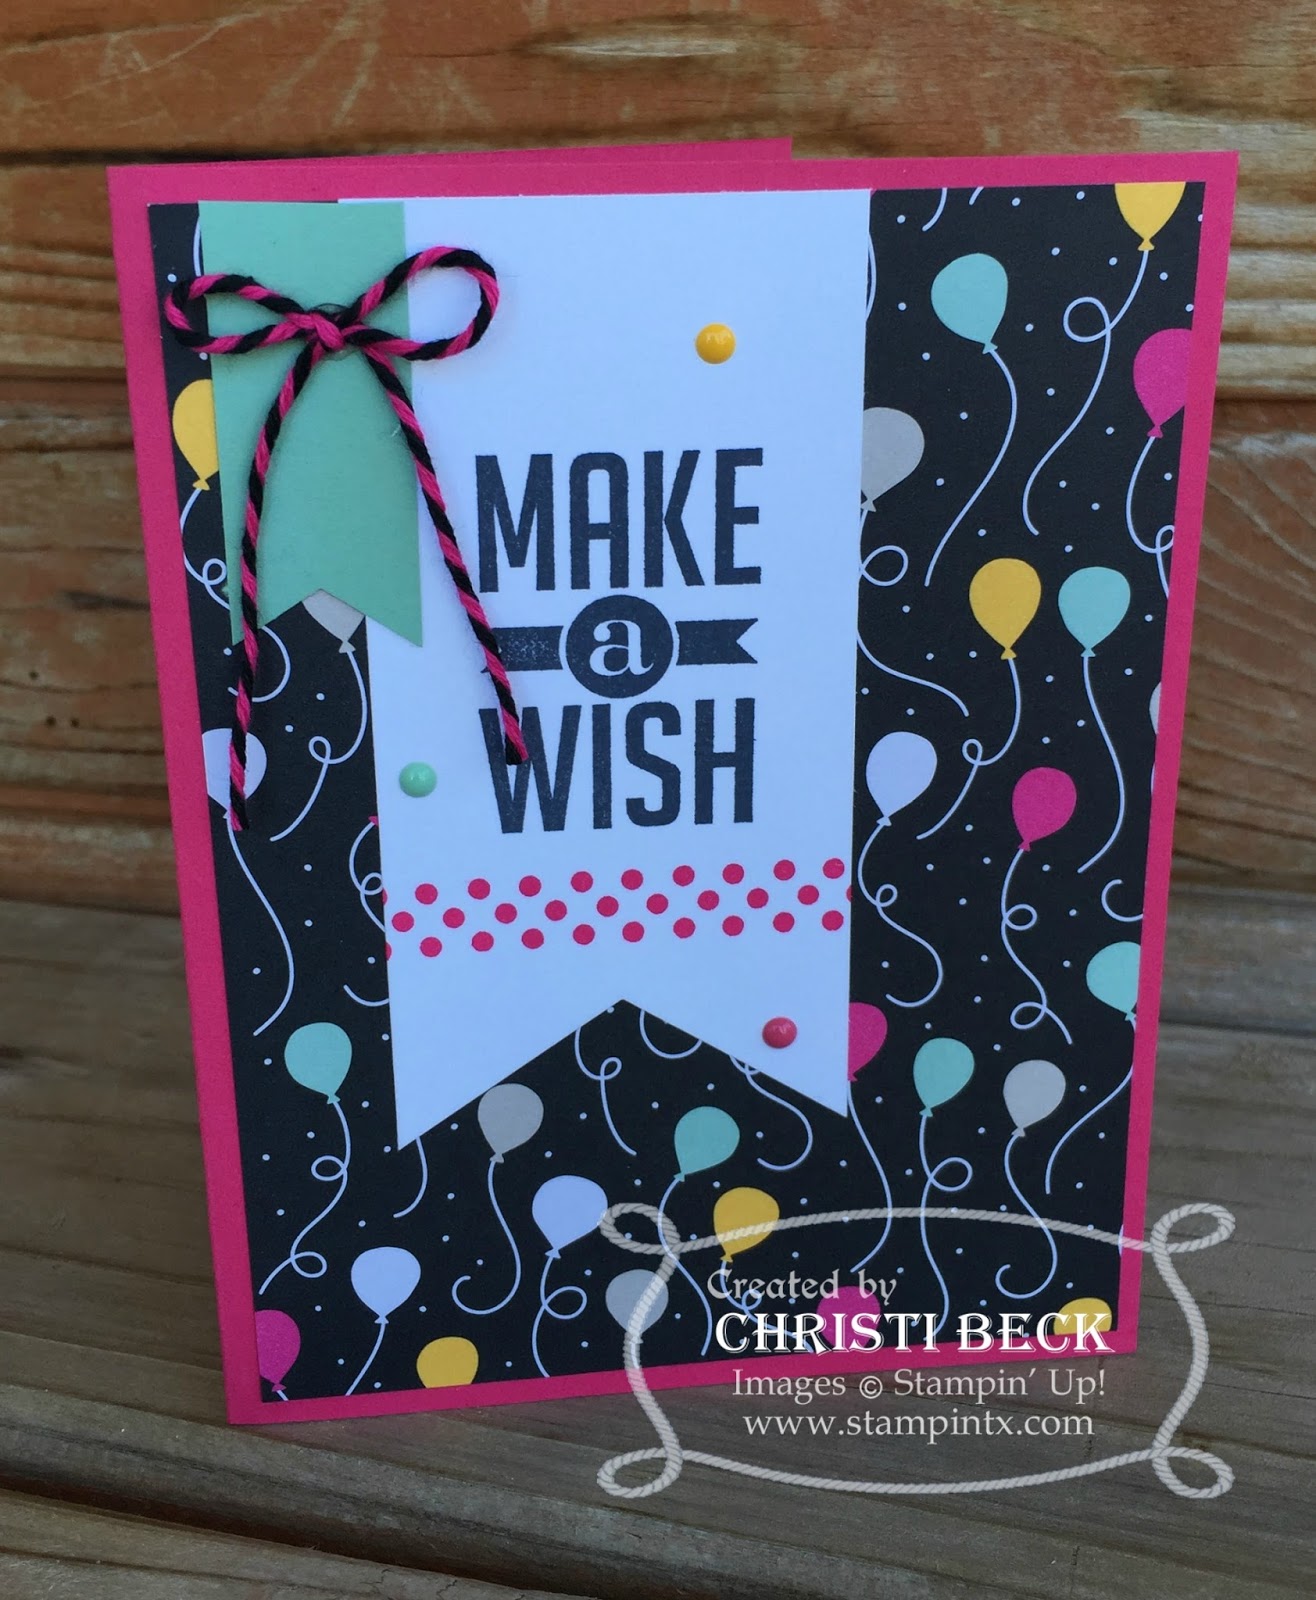
Card #2 - Wish Big Banner Card
Make cute little banners to adorn the front of your card.


Card #3 - Celebrate
So pretty and bright! I love the way the cake piece sits on top creating a bit of a "shadow box" effect.


The Tags:
Wouldn't these tags look adorable on a gift bag or box? They're super quick to put together but very cute!


Helpful Tips for the Birthday Bright Project Kit:

  • You'll need a few additional supplies to create this kit just like the pictures I've shown:
    Birthday Bright Stamp Set
    Coordinating Ink Pad Colors: Emerald Envy, So Saffron, Watermelon Wonder and Basic Black
  • I found that the little pennants on card #2 need to have a glue dot placed between the folds of the sticker. The stickers are handy because they simply fold over the twine but a glue dot helps not only keep them closed but also keeps them stuck to the card base (I personally didn't want mine moving all over but you can leave them free to flutter in the breeze, if you like).
  • Make one set of cards (or set of tags) at a time. I stamped all the pieces for one card and then worked on just that one set of cards until they were all finished.
  • Invite a friend over to make the kit with you! What's more fun than gathering with friends to make cards together? One friend could be stamping the pieces of one set of cards while you work on another set. Divide and conquer!
  • Keep all your cards and tags in the beautiful box they come in. Or, put a gift inside the box for the birthday boy or girl and then you'll have a coordinating card and tag to go with it!
Project kits really can make creating and crafting so quick and lots of fun! The Birthday Bright Project Kit is no exception. It will only be around until May 31, 2017 so get your hands on one (or more) today!

Happy Stamping,


Friday, January 13, 2017

I'm Bringing Birthdays Back

For 2017 I want to celebrate your birthday with a hand-stamped card from me! Text, Facebook and e-mail messages are nice but nothing beats an actual card in the mailbox. 

My stampers and crafters are the heart of my business and I would love the opportunity to send a birthday card to celebrate you! That's why I'm starting a new program - "I'm Bringing Birthdays Back".

Signing up is easy. Simply click the link below and add your information. Even if your birthday is in January, it's not too late.


Twenty three January birthday cards were sent far and wide - from Australia, to California to New York and everything in between!


As a homeschooling mother, I thought it would be fun for the kids and I to plot all the locations each month where the cards are going. 


Every month we'll be adding more locations as the cards are mailed out. Do you think we'll be able to get one birthday card in each of the 50 states by the end of the year? That's our goal!


I hope you'll be a part of the new "I'm Bringing Birthdays Back" program with me! I wonder where the next card will be sent?

Happy Stamping,


Sunday, December 25, 2016

Merry Christmas

Have a very Merry Christmas! Enjoy this day with your family and friends!

I have a little gift for all of my blog readers. It's an instructional tutorial that uses a NEW stamp set called Balloon Adventures coming in the new Occasions Catalog (begins January 4th). Do you like Sneak Peeks? This one's just for you!


Merry Christmas and Happy New Year!

I look forward to stamping with you in 2017! (More sneak peeks to come!)

Happy Stamping,


Tuesday, March 15, 2016

Sweet and Simple Birthday

I am so inspired by the swap card I received from Sharon, my friend and fellow demonstrator, who is always so creative when it comes to maximizing the supplies she uses on her cards. Look closely at the birthday card below. She simply used strips of designer paper to create the candles as well as the design along the bottom. How cute and simple is that? What a fun way to use paper scraps! (Are you a paper scrap hoarder like me? It's ok to admit it here!)


And, the flame of the candle is made simply by using the wing shape from the Bird Builder Punch.


Over the years, I've received so many great card swaps from Sharon as well as other demonstrators who are a part of our Cowtown Crafters team. That's the best part about being in a group - we support, share and encourage one another!

Did you know when you purchase your Starter Kit through me, you become a part of that supportive team, too? Whether you're near or far, you can be a part of the swaps, make-n-takes, ideas and inspiration! Check out the benefits here.

The pictures below were from our most recent demonstrator gathering:


We always have a great time stamping and sharing together! 


Supplies Used for the Birthday Card:

Happy Stamping,

Friday, March 4, 2016

Hip Hip Hooray It's Your Birthday

I sure am enjoying playing with the new Party Pop-Up Thinlits Dies. They add such a great "Wow!" factor to any card! And, they're super easy to use with your Big Shot Die Cutting Machine.

**We'll be creating this fun card during my monthly stamp classes. If you're in the DFW area and would like to come stamp with me, just RSVP online and I'll send you the exact location address.


Tips for Using the Party Thinlits Dies:
  • When you cut the Hip Hip Hooray die from a sheet of card stock, you'll notice that on the right and left side it didn't cut all the way through the paper. It's ok. Simply cut on the line to remove the image and then add to the front of the card.
  • To create a pop-up in the middle of your card (like in the card below):  Look closely at the dies. They have arrows pointing up and down. Line up these arrows on the crease in your card stock. Then run through the Big Shot. You'll create a "Wow!" factor for sure with this pop-up in your card!

Here's what the dies look like:


Supplies Used for the Hip Hip Hooray card:

Below is an example of using the Happy Birthday Thinlits for the inside of the card.


How fun is that? Isn't that a neat "Wow!" factor?


The Party Pop-Up Thinlits are a great addition to any craft room!

Happy Stamping,

Monday, February 15, 2016

Hip, Hip, Hooray Birthday Card

Birthday cards - everyone needs them and sometimes we need a lot of them! As I was creating this card, however, I realized that the Hip Hip Hooray on the front can be for birthdays and so much more! Just stamp the needed sentiment on the inside to fit any celebration like "It's Your Birthday!" or "On Your Promotion" or "You Retired Today". I think you get the idea.

So, would you like the written step-by-step instructions for this fun card? I thought so. Here's the tutorial for Hip Hip Hooray!


What do you think? Isn't that a fun and versatile card? I hope you enjoy the inspiration!

Supplies Used:


Built for Free Using: My Stampin Blog


Shop for these and all your stamping supplies 24/7 through my online store AND take advantage of the amazing Sale-a-Bration deals going on through March 31st.

Happy Stamping,


Thursday, February 4, 2016

Happy Birthday Confetti Style

Birthday cards! Do you send them? Are you always in need of them? I know I go through my birthday card stash so quickly and I'm always looking for quick, simple and cute birthday cards. Do you think this one fits the bill? I do!


If you like this instruction sheet, my StampinTexas subscribers get even more! That's right! As a subscriber you'll not only get exclusive project sheets delivered straight to your inbox, you'll also get the latest information on promotions and upcoming events.
Get subscribed today! 


The birthday products in the Occasions Catalog are just so fun and festive! Get your hands on these fun birthday products 24/7 through my Online Store and, with your qualifying order during Sale-a-Bration, you can also get exclusive products for FREE!

Supplies Used:


Built for Free Using: My Stampin Blog


Happy Stamping,


Monday, January 4, 2016

Last Chance First Glance

Today is your last chance to order from the Holiday Catalog and the Year End Sale but it's also time to take a look at some adorable new products coming (the new Occassions Catalog and Sale-a-Bration catalog goes live tomorrow). I can't wait to share these amazing catalogs with you! I will post them on my blog first time tomorrow - Tuesday, January 5th.

In the meantime, enjoy these fun project ideas that all use the NEW Party Wishes stamp set and coordinating products! If you need birthday cards for the new year, then this set will sure come in handy!


Stay tuned for more fun project ideas to come! The new catalogs are amazing and I think you're going to love all the new products!  The links for the Occasions Catalog and Sale-a-Bration catalog will be posted tomorrow!

Are you new to Sale-a-Bration and want to know more about this exciting promotion? Get all the details here.

Happy Stamping,